The following guide will teach you how to jailbreak the iPhone 3G
running on iOS 4.0, using a simple tool called Redsn0w. The steps bellow are easy to follow and can be completed by anyone. The process itself will take some time and it will require some simple software like iTunes. You can do this if you use Windows or MAC OS X
. Let the liberating process begin. Before you start this, there are a couple of things that you need to know. You can jailbreak the iPhone 3G with iOS 4.0 only if your baseband version is up to 5.13.04. You can check it by going to Settings > General > About and looking for Modem Firmware, at the bottom. Also, make sure you have read the dangers of a jailbreak process because we do not take any responsibility for any damaged devices. After this you can proceed to unlocking the iPhone 3G ( coming soon ).
Jailbreak iPhone 3GS with iOS 4.0
How to Jailbreak iPhone 3G on iOS 4.0 with Redsn0w
Install iTunes using the file you just downloaded. Now use an USB cable to connect your iPhone 3G to the PC / MAC and let it sink with iTunes. Update to iOS 4.0 using iTunes.
Unzip the Redsn0w tool downloaded above and then double click the folder. You should find the Redsn0w.exe file. Right-click it and then select “Run as Administrator”.
In the Redsn0w screen, click on the “Browse” button and choose your iOS 4.0 firmware downloaded above. Once it says successfully identified click Next. In the next windows, choose to install Cydia, enable Multitasking, Homescreen Wallpaper and Battery percentage then click Next.
Now turn off the iPhone 3G and leave it plugged in, as Redsn0w suggests. Afterward, click next and hold the smartphone in your hand because you will need to press some buttons.
Pay attention: Hold the Power button for 3 seconds and then, without releasing it start holding down Home. Let go of the Power button after 6 seconds. Keep holding the Home button until the screen in Redsn0w changes ( approximately 20 seconds ) .
A series of automated processes will follow and all you have to do is to wait for the reboot. Enjoy.
Hi all, First & foremost I would like to give a shout out to Saurik for figuring out Apple's Signature Server, and also to Bondkt on ModiMyIphone who gave me the last piece to the puzzle.
Ok - so down to the steps that I did to get my Rogers and Fido phones working.
I have done this now 4 times on my phone and also on friends & family phones with the same success consistently.
There are some posts out there that mention that you do MIGHT NOT have to do ALL of these steps, but I've found that if you are not 100% sure of what was done BEFORE doing these steps, instead of trying to guess, just to do all the steps anyways, as it might only take an extra 5 to 10 minutes all of the steps that are considered “extra”.
The perfect example of this would be that I've been playing with my phone since before Sept 12th and my buddy since Sept 9th and we must of upgraded / downgraded / DFU'ed / Restored DOZENS of times before we got it right with the help of forums & YouTube & the community. We've always been successful getting the firmware back down to / up to version 3.0, however we would always lose our carrier network connectivity after the Jailbreak / Downgrade process, until now.
Here are my environment settings (from iPhone "Settings" > "About" screen):
Code:
Phone          =          iPhone 3G - 8 GB - Black
Network        =          Rogers (or Fido)
Line           =          Rogers (or Fido)
Version        =          3.0 (7A341)
Carrier        =          Rogers 4.0
Model          =          MB629C
Modem Firmware =          05.11.07
(Baseband)
Here are the software apps that I used:
iTunes version 8.1.1: (Newer version of iTunes like 8.2.x or 9.x will probably work as well, but I did not test these. Try your current version of iTunes, and if it does not work, do a full Uninstall iTunes via Windows "Add / Remove Program", and Re-Install iTunes using version linked below) Click Here for iTunes version 8.1.1 from MegaUpload
*** NOTE: the iPhone Firmware Links above are ONLY for iPhone 3G and NOT iPhone 2G or iPhone 3Gs. If you are not using an iPhone 3G, please find the same version firmware built specifically for your phone.
Step by Step:
1. Connect your phone to your PC via USB and launch iTunes
2. Get your phone into DFU mode (2 different ways)
3. iTunes will recognize that your iPhone is in recovery mode
This image has been resized. Click this bar to view the full image. The original image is sized 468x152.
4. In iTunes, while holding down SHIFT on your keyboard, mouse-click on the RESTORE button.
This image has been resized. Click this bar to view the full image. The original image is sized 470x321.
5. Browse to and select your iPhone 3.1 Firmware.
6. Sit back and let Update run. This will take a few minute while you see Apple logo on your iPhone with Progress bar.
Click this bar to view the full image.
7. After this restore, and the phone boots up, you SHOULD have Carrier Network Services. In our cases, it is either Rogers or Fido, but it should be whatever carrier your SIM card is set to.
This image has been resized. Click this bar to view the full image. The original image is sized 485x302.
*** NOTE: At this point, if you are still not connected to your respective Carrier Network, then I would suggest you do not continue further with these steps. You could of course repeat Steps 1 to 7 again if you have any doubts, but if you still are not connecting, then these steps no longer apply to you and you should start doing research for an alternative method.
8. Close iTunes.
9. Open your Windows "hosts" file with NOTEPAD. Typical location:
Code:
C:WindowsSystem32driversetchosts
Here's an example of what the "hosts" file looks like:
10. Add the following line to the END of your "hosts" file:
Code:
74.208.105.171 gs.apple.com
11. Save & Close your "hosts" file.
12. Re-Launch your iTunes.
13. Do another RESTORE as you did in steps 2 to 6 > However this type select iPhone Firmware version 3.0
14. At the end of the Update (similar to process in Step 6), you will get an error in iTunes - DON'T WORRY, THIS IS SUPPOSED TO HAPPEN:
Code:
The iPhone "iPhone" could not be restored. An unknown error occurred (1015).
15. Clear the error in iTunes by clicking "OK". Your phone should now be in RECOVERY mode (and not DFU mode). See image below. If you are not sure what mode your iPhone is in, just put it back into DFU mode as explained in step 2.
16. You now need to REPEAT for a SECOND time the RESTORE process as explained in Step 13, RE-Selecting the iPhone Firmware version 3.0. You will be essentially repeating steps 4 to 6 AGAIN, except for the firmware version.
17. You will ONCE AGAIN see the SAME error as you did in Step 14. ONCE MORE, THIS IS NORMAL AND YOU SHOULDN'T WORRY.
18. Close iTunes.
*** NOTE: Read Steps 19 to 23 in advance before continuing.
19. Launch QuickPwn, BUT DO NOT CLICK ON ANYTHING ELSE. (Read all of Step 20 before continuing)
20. You should see a standard Windows window (and not the QuickPwn app) pop up and instruct you to "...hold home button \ sleep wake button for 15 secs etc..." >>> Go ahead and do this, AS SOON as you see the Apple Logo appear on your iPhone, go ahead and click "OK" button on the dialog window. DO NOT CLICK "OK" UNTIL YOU SEE THE APPLE LOGO.
21. After you click on "OK" in the MS Windows message box, pay attention to your iPhone. You should see a progress bar VERY BREIFLY as shown in Step 6.
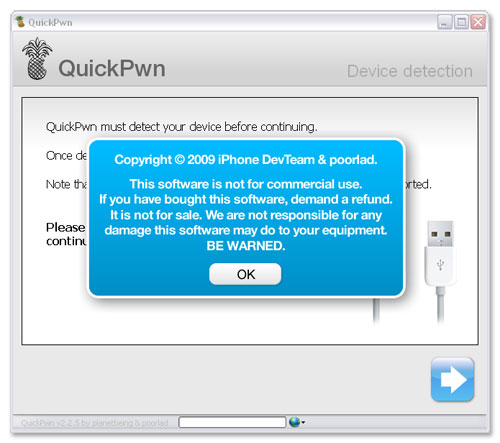
22. Once complete, you should arrive at a screen similar to the one below (message in blue box might be different):
This image has been resized. Click this bar to view the full image. The original image is sized 500x443.
23. Once your iPhone gets to your "Lock" screen, you can exit QuickPwn Completely.
24. You may or may not at this point now have a working iPhone on Firmware version 3.0, while still being able to connect to your respective Carrier Network. This step was NOT consistent, sometimes the iPhone would remain in recovery mode, while other times it would be fully functionally. THIS DOES NOT MATTER, since your phone is still not fully JAILBROKEN at this point.
25. Launch Redsn0w.
26. There are several very good illustrated guides out there already:
27. It is interesting to NOTE that on about 50% of the phones that we did, redsn0w would FREEZE or LOCK UP between the "Installing Bundles" and "Syncing Filesystems". THIS IS OK. Just run redsn0w a second time (Steps 25 to 26) and you will be fine.


