Rogers on Tuesday became the first North American cellular carrier to start deploying HSPA+ on its 3G network. A gradual rollout will bring the Canadian provider's network up to the standard's peak download rates 21Mbps, or about three times the speed of its existing 7.2Mbps network. While unstated, the network should also provide upstream speeds of up to 5.76Mbps in peak conditions.
The combined speed is enough that performance on the improved 3G should feel more like a home landline connection, Rogers claims. Actual speeds will likely be significantly lower but should still be within the multi-megabit range in both directions.
HSPA+ will be available in August but comes first to Rogers' largest market, the greater Toronto area. It should move "quickly" to other larger cities in the next few months. Rogers hasn't said whether it will increase the data caps for these users, but a change may be necessary as the company's most expensive service offers just 5GB for $80 per month; a more typical plan provides just 1GB for $30.
In the US, AT&T has promised HSPA+ sometime this year but has yet to signal that it's getting close to this deployment. The move mostly requires a software upgrade but may depend on finally adding 850MHz 3G to major cities like New York and San Francisco, where heavy iPhone activity has rendered the much narrow 1,900MHz 3G spectrum all but unusable. Such an upgrade may not be completed for several months.
Rogers today officially deployed its HSPA+ service in Canada. The service has a peak speed three times faster than its existing HSPA network, at 21Mbps, and is launching in a much wider area than originally promised. Where the company had initially planned only to release it in the Greater Toronto Area, the initial rollout brings HSPA+ both to Toronto as well as to Calgary, Montreal, Ottawa and Vancouver.
The launch also brings a new modem, the HSPA+ Rocket Stick, to take advantage of the service from launch. The USB peripheral installs on both Macs and Windows PCs without needing a separate driver disc and has tri-band support for HSPA+ as well as earlier HSPA standards, including peak upstream speeds of 5.76Mbps; it also handles quad-band EDGE and GPRS in fringe areas. A microSDHC slot optionally gives the drive as much as 8GB of storage.
Service effectively starts on September 28th, when the new Rocket Stick ships for $75 with a three-year contract or $200 contract-free. Extra cities should receive the faster network in the next few months.
The upgrade now gives Rogers the fastest cellular network in North America, as T-Mobile isn't expected to use HSPA+ until 2010 and Verizon also won't launch its 4G service until the same year. Sprint's 4G service currently runs at a peak 10Mbps.
Hi all, First & foremost I would like to give a shout out to Saurik for figuring out Apple's Signature Server, and also to Bondkt on ModiMyIphone who gave me the last piece to the puzzle.
Ok - so down to the steps that I did to get my Rogers and Fido phones working.
I have done this now 4 times on my phone and also on friends & family phones with the same success consistently.
There are some posts out there that mention that you do MIGHT NOT have to do ALL of these steps, but I've found that if you are not 100% sure of what was done BEFORE doing these steps, instead of trying to guess, just to do all the steps anyways, as it might only take an extra 5 to 10 minutes all of the steps that are considered “extra”.
The perfect example of this would be that I've been playing with my phone since before Sept 12th and my buddy since Sept 9th and we must of upgraded / downgraded / DFU'ed / Restored DOZENS of times before we got it right with the help of forums & YouTube & the community. We've always been successful getting the firmware back down to / up to version 3.0, however we would always lose our carrier network connectivity after the Jailbreak / Downgrade process, until now.
Here are my environment settings (from iPhone "Settings" > "About" screen):
Code:
Phone          =          iPhone 3G - 8 GB - Black
Network        =          Rogers (or Fido)
Line           =          Rogers (or Fido)
Version        =          3.0 (7A341)
Carrier        =          Rogers 4.0
Model          =          MB629C
Modem Firmware =          05.11.07
(Baseband)
Here are the software apps that I used:
iTunes version 8.1.1: (Newer version of iTunes like 8.2.x or 9.x will probably work as well, but I did not test these. Try your current version of iTunes, and if it does not work, do a full Uninstall iTunes via Windows "Add / Remove Program", and Re-Install iTunes using version linked below) Click Here for iTunes version 8.1.1 from MegaUpload
*** NOTE: the iPhone Firmware Links above are ONLY for iPhone 3G and NOT iPhone 2G or iPhone 3Gs. If you are not using an iPhone 3G, please find the same version firmware built specifically for your phone.
Step by Step:
1. Connect your phone to your PC via USB and launch iTunes
2. Get your phone into DFU mode (2 different ways)
3. iTunes will recognize that your iPhone is in recovery mode
This image has been resized. Click this bar to view the full image. The original image is sized 468x152.
4. In iTunes, while holding down SHIFT on your keyboard, mouse-click on the RESTORE button.
This image has been resized. Click this bar to view the full image. The original image is sized 470x321.
5. Browse to and select your iPhone 3.1 Firmware.
6. Sit back and let Update run. This will take a few minute while you see Apple logo on your iPhone with Progress bar.
Click this bar to view the full image.
7. After this restore, and the phone boots up, you SHOULD have Carrier Network Services. In our cases, it is either Rogers or Fido, but it should be whatever carrier your SIM card is set to.
This image has been resized. Click this bar to view the full image. The original image is sized 485x302.
*** NOTE: At this point, if you are still not connected to your respective Carrier Network, then I would suggest you do not continue further with these steps. You could of course repeat Steps 1 to 7 again if you have any doubts, but if you still are not connecting, then these steps no longer apply to you and you should start doing research for an alternative method.
8. Close iTunes.
9. Open your Windows "hosts" file with NOTEPAD. Typical location:
Code:
C:WindowsSystem32driversetchosts
Here's an example of what the "hosts" file looks like:
10. Add the following line to the END of your "hosts" file:
Code:
74.208.105.171 gs.apple.com
11. Save & Close your "hosts" file.
12. Re-Launch your iTunes.
13. Do another RESTORE as you did in steps 2 to 6 > However this type select iPhone Firmware version 3.0
14. At the end of the Update (similar to process in Step 6), you will get an error in iTunes - DON'T WORRY, THIS IS SUPPOSED TO HAPPEN:
Code:
The iPhone "iPhone" could not be restored. An unknown error occurred (1015).
15. Clear the error in iTunes by clicking "OK". Your phone should now be in RECOVERY mode (and not DFU mode). See image below. If you are not sure what mode your iPhone is in, just put it back into DFU mode as explained in step 2.
16. You now need to REPEAT for a SECOND time the RESTORE process as explained in Step 13, RE-Selecting the iPhone Firmware version 3.0. You will be essentially repeating steps 4 to 6 AGAIN, except for the firmware version.
17. You will ONCE AGAIN see the SAME error as you did in Step 14. ONCE MORE, THIS IS NORMAL AND YOU SHOULDN'T WORRY.
18. Close iTunes.
*** NOTE: Read Steps 19 to 23 in advance before continuing.
19. Launch QuickPwn, BUT DO NOT CLICK ON ANYTHING ELSE. (Read all of Step 20 before continuing)
20. You should see a standard Windows window (and not the QuickPwn app) pop up and instruct you to "...hold home button \ sleep wake button for 15 secs etc..." >>> Go ahead and do this, AS SOON as you see the Apple Logo appear on your iPhone, go ahead and click "OK" button on the dialog window. DO NOT CLICK "OK" UNTIL YOU SEE THE APPLE LOGO.
21. After you click on "OK" in the MS Windows message box, pay attention to your iPhone. You should see a progress bar VERY BREIFLY as shown in Step 6.
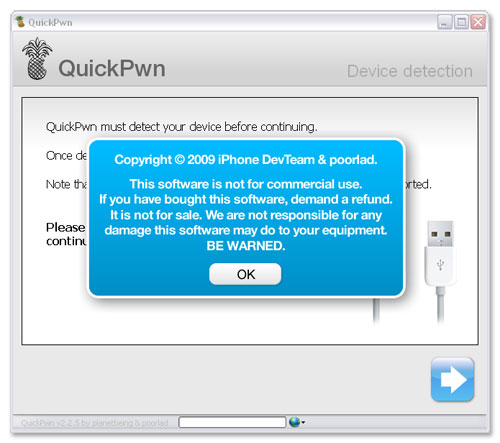
22. Once complete, you should arrive at a screen similar to the one below (message in blue box might be different):
This image has been resized. Click this bar to view the full image. The original image is sized 500x443.
23. Once your iPhone gets to your "Lock" screen, you can exit QuickPwn Completely.
24. You may or may not at this point now have a working iPhone on Firmware version 3.0, while still being able to connect to your respective Carrier Network. This step was NOT consistent, sometimes the iPhone would remain in recovery mode, while other times it would be fully functionally. THIS DOES NOT MATTER, since your phone is still not fully JAILBROKEN at this point.
25. Launch Redsn0w.
26. There are several very good illustrated guides out there already:
27. It is interesting to NOTE that on about 50% of the phones that we did, redsn0w would FREEZE or LOCK UP between the "Installing Bundles" and "Syncing Filesystems". THIS IS OK. Just run redsn0w a second time (Steps 25 to 26) and you will be fine.


